
How to Uninstall DriverSoftPro on Windows 10

Want to Uninstall DriverSoftPro from your PC? Not an issue. Uninstall the application in a few clicks with the help of different methods: Start menu, Windows Settings, or Control Panel.

Option 1: Uninstall DriverSoftPro from the Start Menu

image
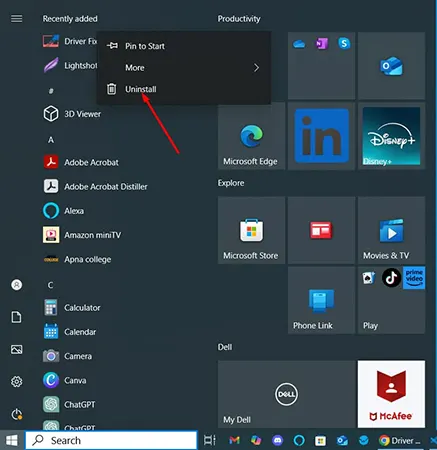
  • Access Start and find DriverSoftPro in the list of applications already installed.
  • Right-click on DriverSoftPro.
  • Select Uninstall.
  • Follow the on-screen instructions to complete the software uninstallation process.

Option 2: Uninstall DriverSoftPro from Settings

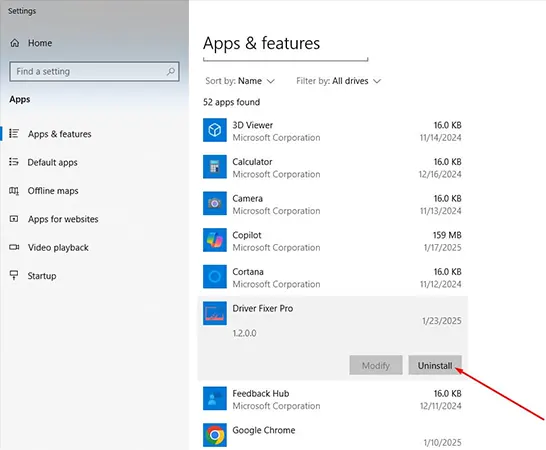
DriverSoftPro can also be uninstalled through Windows Settings. For this, all you need to do is:
image
  • Open Settings from the Start menu.
  • Navigate to Apps > Apps & features.
  • Find DriverSoftPro in the list.
  • Click Uninstall.
  • Follow the on-screen instructions to complete the uninstallation process.

Option 3: Uninstall DriverSoftPro using Control Panel

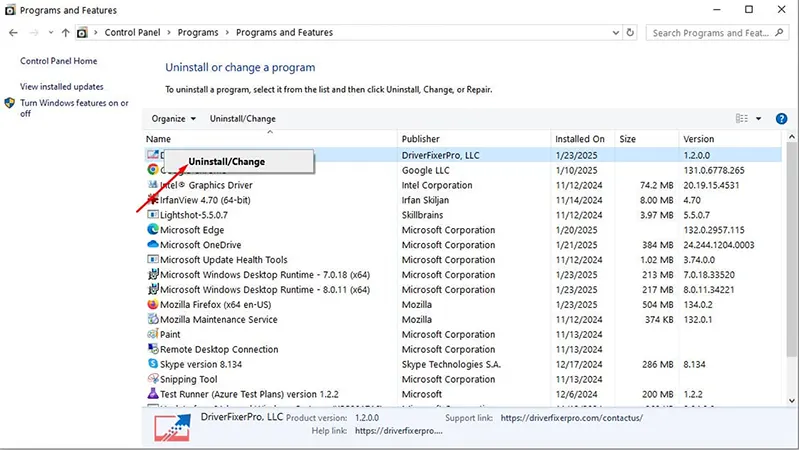
If you are more comfortable using Control Panel to uninstall an application, then here is the process to be followed:
image
  • Click on the Windows Search box on the Taskbar.
  • Type Control Panel and click it to open.
  • Click Programs and Features.
  • Find DriverSoftPro in the list appeared.
  • Right-click on it and then select Uninstall.
  • Follow the instructions given on your system’s screen to finish the DriverSoftPro uninstallation process.

Having a problem uninstalling DriverSoftPro?

If you cannot find DriverSoftPro in the list or if you are unable to uninstall DriverSoftPro, then please contact our support team. We are available round the clock to help you.